Range/Stove/Oven

Range/Stove/Oven Parts, Accessories & Repair Help


Are you having trouble with your oven/stove/range because it quits in performing as required. You are at the right place! Obinlinks Repair will help you fixing your stove by offering the best repairing services. With certified and experienced technicians we are cable of returning your stove back into performance. Find the below symptoms of troubleshooting your stove.


Range/Stove/Oven Parts, Accessories & Repair Help

Cause 1

Igniter
The igniter draws electrical current through the oven safety valve bimetal to open the valve letting gas into the oven burner and igniting it. If the oven igniter weakens it can take longer than normal to open the safety valve causing oven temperature issues. To determine if the igniter is defective, observe the igniter when the oven is heating. If the igniter glows for more than 90 seconds without igniting the gas flame, this indicates that the igniter is too weak to open the oven safety valve correctly. If the igniter is weak, replace it.

Cause 2

Bake Element
If the bake element is burned out, the oven will only be heated by the broil element. This will cause the oven to heat unevenly. When the bake element is heating properly, it glows red hot. If the element does not glow red, this indicates that the element is not heating. Often, if the element has burned out, it will be visibly damaged. Inspect the bake element for holes or blisters. To determine if the bake element has burned out, use a multimeter to test the element for continuity. If the bake element does not have continuity, replace it..

Cause 3

Broil Element
If the broil element is burned out, only the bake element will heat the oven. This will cause the oven to heat unevenly. When the broil element is heating properly, it glows red hot. If the element does not glow red, this indicates that the element is not heating. Often, if the element has burned out, it will be visibly damaged. Inspect the broil element for holes or blisters. To determine if the broil element has burned out, use a multimeter to test the element for continuity. If the broil element does not have continuity, replace it.

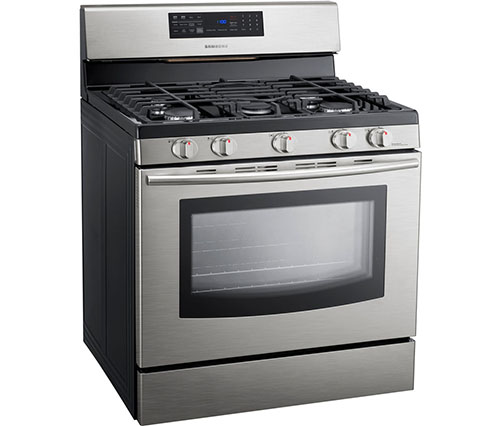
Cause 1

High Limit Thermostat
The high limit thermostat sends voltage to the oven fan as the oven heats up. If the high limit thermostat is defective, it may keep sending voltage to the oven fan after the oven has cooled down. To determine if the high limit thermostat is at fault, use a multimeter to test the thermostat for continuity. If the high limit thermostat does not have continuity, replace it.

Cause 2

Oven Control Board
The oven control board has relays that regulate power to the bake, broil and fan circuits according to the user settings and sensor input. If one of these relays shorts out, the control board may send continuous voltage to the oven fan. However, this is rarely the case. Before replacing the control board, first check the oven thermostats. If an oven thermostat fails, it may cause the oven fan to run continuously.

Cause 3

Thermostat
The thermostat sends voltage to the oven fan as the oven heats up. If the thermostat contacts are stuck closed, the thermostat may continue to send voltage to the oven fan after the oven has cooled down. To determine if the thermostat is at fault, use a multimeter to test the thermostat for continuity. If the thermostat shows continuity at any temperature, this indicates that the thermostat is defective. If the thermostat is defective, replace it.

Cause 1

Bake Element
When the bake element is heating properly, it glows red hot. If the element does not glow red, this indicates that the element is not heating. Often, if the heating element has burned out, it will be visibly damaged. Inspect the heating element for holes or blisters. To determine if the bake element has burned out, use a multimeter to test the element for continuity. If the bake element does not have continuity, replace it.

Cause 2

Igniter
The igniter is the most commonly defective part for an oven not heating. The igniter has two main functions. First, the igniter draws electrical current through the oven safety valve to open it. Second, the igniter gets hot enough to glow and ignite the gas in the oven burner. If the igniter gets weak, it will fail to open the safety valve correctly. If the valve does not open, the oven will not heat. To determine if the igniter is defective, observe the igniter when the oven is on. If the igniter glows for more than 90 seconds without igniting the gas flame, this indicates that the igniter is too weak to open the valve. If the igniter is weak, replace it. If the igniter does not glow at all, use a multimeter to test the igniter for continuity. If the igniter does not have continuity, replace it.

Cause 3

Bake or Broil Spark Electrode
For bake & broil burner ignition an oven burner spark electrode is used to ignite the gas. The electrode is a device that sits right next to the burner. It functions like a spark plug. As power is applied to it a spark jumps from the spark electrode tip to the to the electrode shield, igniting the gas. If the electrode is broken or worn out the spark may not occur. Visually inspect the electrode assembly for cracks in the porcelain housing or damage to the electrode tip itself. Be aware that a proper ground and the correct polarity of the incoming voltage to the range is necessary for the electrode control to sense the presence of a flame once the burner is ignited. If the burner goes off after ignition check for proper ground and the correct polarity at the wall outlet.

Cause 1

Spark Ignition Switch and Harness
One of the spark ignition switches might be defective. The spark ignition switch sends voltage to the spark module. When the electrical contacts inside the switch close, power flows to the spark module. If the switch contacts are wet or stuck in a closed position, the switch will send continuous voltage to the spark module, no matter where the dial is set. Each of the switches can be tested individually to determine if they are shorted. If a spark ignition switch is shorted and is not wet, or if drying it out doesn’t solve the problem, replace the switch.

Cause 2

Spark Ignition Switch
One of the spark ignition switches might be defective. The spark ignition switch sends voltage to the spark module. When the electrical contacts inside the switch close, power flows to the spark module. If the spark ignition switch fails with the electrical contacts closed, the switch will send continuous voltage to the spark module. To determine if any of the spark ignition switches is defective, use a multimeter to test each of the switches for continuity. If a spark ignition switches shows continuity at all settings, replace it.

Cause 3

Spark Module
The spark module provides power to each surface burner spark electrode. If the spark module fails, it may cause the burners to spark continuously. However, the spark ignition switch is more likely to be at fault. Before replacing the spark module, first test the spark ignition switch. If the spark ignition switch is working properly, consider replacing the spark module.

Cause 1

Igniter
The igniter glows to ignite the gas in the burner assembly. To determine if the igniter is defective, observe the igniter as the oven is heating. If the igniter glows for more than 90 seconds without igniting the gas flame, this indicates that the igniter is too weak to ignite the gas. If the igniter is weak, replace it.

Cause 2

Broil Element
The broiler element may have burned out. When the broil element is heating properly, it glows red hot. If the element does not glow red, this indicates that the element is not heating. Often, if the element has burned out, it will be visibly damaged. Inspect the broil element for holes or blisters. To determine if the broil element has burned out, use a multimeter to test the element for continuity. If the broil element does not have continuity, replace it.

Cause 3

Bake or Broil Spark Electrode
For broil burner ignition an oven broiler burner spark electrode is used to ignite the gas. The electrode is a device that sits right next to the broil burner. It functions like a spark plug. As power is applied to it a spark jumps from the spark electrode tip to the to the electrode shield, igniting the gas. If the electrode is broken or worn out the spark may not occur. Visually inspect the electrode assembly for cracks in the porcelain housing or damage to the electrode tip itself. Be aware that a proper ground and the correct polarity of the incoming voltage to the range is necessary for the electrode control to sense the presence of a flame once the burner is ignited. If the burner goes off after ignition check for proper ground and the correct polarity at the wall outlet.

Cause 1

Outer Door Glass
If the outer door glass is broken, it can be replaced. This oven door repair requires that the oven door be removed from the oven and layed down on a sturdy flat surface. The outer door glass is made of tempered glass. Use eye and hand protection when performing this oven door repair.

Cause 2

Door Hinge
An oven door repair may be needed if the door hinge breaks or is bent out of shape. Oven doors have two door hinges, a left and right. On some ovens the same hinge is used, on other ovens the right hinge and left hinge have different part numbers. The door hinge sometimes is sold with all necessary parts and springs, other times the parts need to be ordered separately. An oven door repair for a door hinge is a relatively easy repair for a do-it-yourselfer.

Cause 1

Coil Surface Element
First, make sure that the element is pushed all the way into the socket. Second, inspect the surface element for damage. If the element appears to be damaged, replace it. Lastly, use a multimeter to test the surface element for continuity. If the surface element does not have continuity, replace it.

Cause 2

Surface Element Switch
The surface element switch sends voltage to the surface element coil. If the switch is defective, the surface element will not work. If there is another element of the same size on the stove, try switching the elements. If the surface element still doesn’t work, the surface element switch is likely defective. The surface element switch cannot be tested or repaired—if you suspect the switch is defective, replace it.

Cause 3

Surface Element Board
The surface element board has relays that regulate the power supply to the burners. If one or more of the relays fails, the surface element won’t work. If two or more burners fail at the same time, this indicates that the surface element board is likely at fault. If only one surface element won’t work, use a multimeter to test the element for continuity. If the surface element has continuity, the surface element board might be defective

Cause 1

Bake Element
Sometimes, if the heating element burns out, it can short out to the inside of the oven. If the heating element has shorted out, the oven will not turn off. Often, if the bake element has shorted out, it will be visibly damaged. Inspect the heating element for holes or blisters. To determine if the bake element has shorted out, use a multimeter to test the element for continuity. If the bake element does not have continuity, replace it.

Cause 2

Temperature Control Thermostat
The temperature control thermostat monitors the temperature inside the oven and cycles on the heat when the oven temperature gets too low. If the temperature control thermostat fails, the oven won’t heat. However, this is not very common. Before replacing the oven thermostat, first check more commonly defective components—specifically the igniter and the bake and broil elements. If these components are not defective, the temperature control thermostat might be at fault. The temperature control thermostat cannot easily be tested. If you suspect the thermostat is defective, replace it.

Cause 3

Oven Control Board
The oven control board has relays that send voltage to the bake and broil circuits according to the user settings and sensor input. If one of the control board relays shorts closed, the control board may send continuous voltage to the heating circuit. If the oven continues to heat after it is turned off, the control board is likely defective. If the control board is defective, replace it.

Cause 1

Spark Ignition Switch and Harness
When the burner is turned on, the spark ignition switch sends voltage to the spark module to produce a spark. If the spark ignition switch is defective, it won't send voltage to the spark module, and the burner won't be able to produce a spark. If your range's burner isn't sparking, check to see if the other burners are sparking properly. If the other burners are sparking properly, the spark ignition switch is likely defective. If the spark ignition switch is not sold separately, you will have to purchase the switch and harness assembly.

Cause 2

Spark Module
The spark modules provides power to each surface burner spark electrode. If the burner is produces a weak spark, or if the burner sparks intermittently, the spark module might be defective. Before replacing the spark module, first check the spark electrode and the spark wire. If the spark electrode and spark wire are not at fault, the spark module is likely defective. If the spark module is defective, replace it.

Cause 3

Spark Ignition Switch
When the burner is turned on, the spark ignition switch sends voltage to the spark module to produce a spark. If the spark ignition switch is defective, it won't send voltage to the spark module, and the burner won't be able to produce a spark. If your range's burner isn't sparking, check to see if the other burners are sparking properly. If the other burners are sparking properly, the spark ignition switch is likely defective.

Cause 1

Oven Control Board
The oven control board has relays that send voltage to the bake and broil circuits according to the user settings and sensor input. If the control board is defective, it may not send voltage to the heating components.

Cause 2

Temperature Control Thermostat
The oven thermostat sends voltage to the heating circuit and regulates the temperature of the oven during the self-cleaning cycle. It is possible for the oven thermostat to function properly for baking and broiling but not for cleaning. Due to its complexity, the oven thermostat is difficult to test. If you suspect the oven thermostat is at fault, replace it.

Cause 3

Door Lock Motor and Switch Assembly
During the oven's self-cleaning cycle, the door lock switch activates the door lock motor to prevent the oven door from being opened. If the door lock motor and switch assembly is defective, the oven door will not unlock once the self-cleaning cycle is complete. On most ovens, you can open the oven door by removing certain screws or panels. Check your owner's manual for further instructions.

Cause 1

Broil Element
The broil element may have burned out. When the broil element is heating properly, it glows red hot. If the element does not glow red, this indicates that the element is not heating. Often, if the element has burned out, it will be visibly damaged. Inspect the broil element for holes or blisters. To determine if the broil element has burned out, use a multimeter to test the element for continuity. If the broil element does not have continuity, replace it.

Cause 2

Igniter
The igniter draws electrical current through the gas valve to open it. As the igniter weakens over time, it takes longer to open the gas valve. As a result, the oven temperature will drop too low before the burner reignites. The oven temperature should not drop more than 40 degrees Fahrenheit before the igniter relights the burner.

Cause 3

Bake Element
When the bake element is heating properly, it glows red hot. If the element does not glow red, this indicates that the element is not heating. Often, if the heating element has burned out, it will be visibly damaged. Inspect the heating element for holes or blisters. To determine if the bake element has burned out, use a multimeter to test the element for continuity. If the bake element does not have continuity, replace it.

Cause 1

Bake or Broil Spark Electrode
For bake & broil burner ignition an oven burner spark electrode is used to ignite the gas. The electrode is a device that sits right next to the burner. It functions like a spark plug. As power is applied to it a spark jumps from the spark electrode tip to the to the electrode shield, igniting the gas. If the electrode is broken or worn out the spark may not occur. Visually inspect the electrode assembly for cracks in the porcelain housing or damage to the electrode tip itself. Be aware that a proper ground and the correct polarity of the incoming voltage to the range is necessary for the electrode control to sense the presence of a flame once the burner is ignited. If the burner goes off after ignition check for proper ground and the correct polarity at the wall outlet.

Cause 2

Igniter
The igniter is the most commonly defective part for a gas oven that won't turn on. The igniter has two main functions. First, the igniter draws electrical current through the oven safety valve to open it. Second, the igniter gets hot enough to glow and ignite the gas in the burner assembly. If the igniter gets weak, it will fail to open the safety valve correctly. If the valve does not open, the oven will not heat. To determine if the igniter is defective, observe the igniter when the oven is on. If the igniter glows for more than 90 seconds without igniting the gas flame, this indicates that the igniter is too weak to open the valve. If the igniter is weak, replace it. If the igniter does not glow at all, use a multimeter to test the igniter for continuity. If the igniter does not have continuity, replace it.

Cause 3

Bake Element
When the bake element is heating properly, it glows red hot. If the element does not glow red, this indicates that the element is not heating. Often, if the heating element has burned out, it will be visibly damaged. Inspect the heating element for holes or blisters. To determine if the bake element has burned out, use a multimeter to test the element for continuity. If the bake element does not have continuity, replace it.

Cause 1

Light Assembly
The light assembly might be defective. Some manufacturers don’t sell the light assembly components separately, and instead require you to purchase the light assembly.

Cause 2

Light Bulb
The light bulb might be out. Replace the light bulb before replacing any of the other parts associated with the light bulb.

Cause 3

Light Switch
To determine if the light switch is defective, use a multimeter to test it for continuity. If the light switch does not have continuity, replace it.